1. ACCESS REVERSE IMPORT WIZARD
To create an CSV export of all your sub-products in your store, it's best to use the Reverse Import Wizard. You can access this tool through the main navigation or your ProductCart Dashboard in two ways:- WAY #1: Click PRODUCTS > IMPORT PRODUCTS, then click the button "EXPORT FOR RE-IMPORT"
- WAY #2: Click REPORTS > CUSTOM DATA EXPORTS then click the link "Advanced product export (Reverse Import Wizard)" at toward the top of that page.
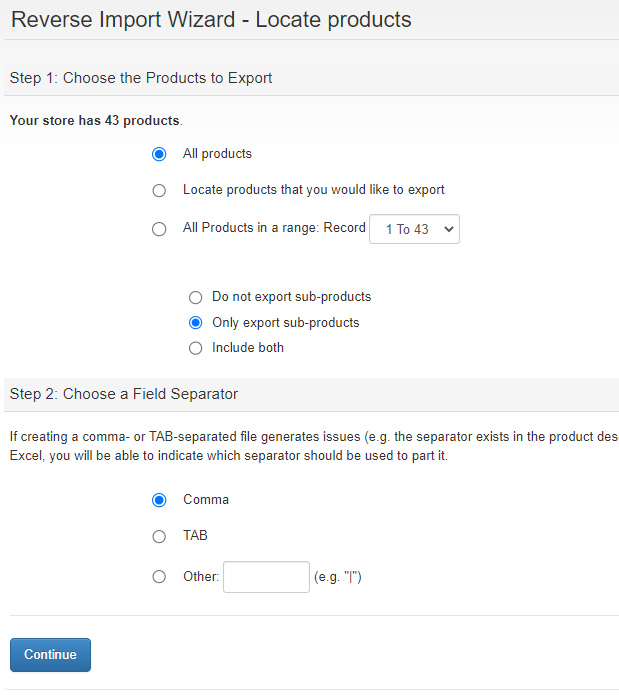
2. CHOOSE FIELDS TO EXPORT
You may not need all of these fields, but you can choose all the ones selected by default. You'll have the ability to delete any unnecessary columns in a spreadsheet editor later. Click " Export Products" when ready. You may see a message box saying to wait while the file is prepared.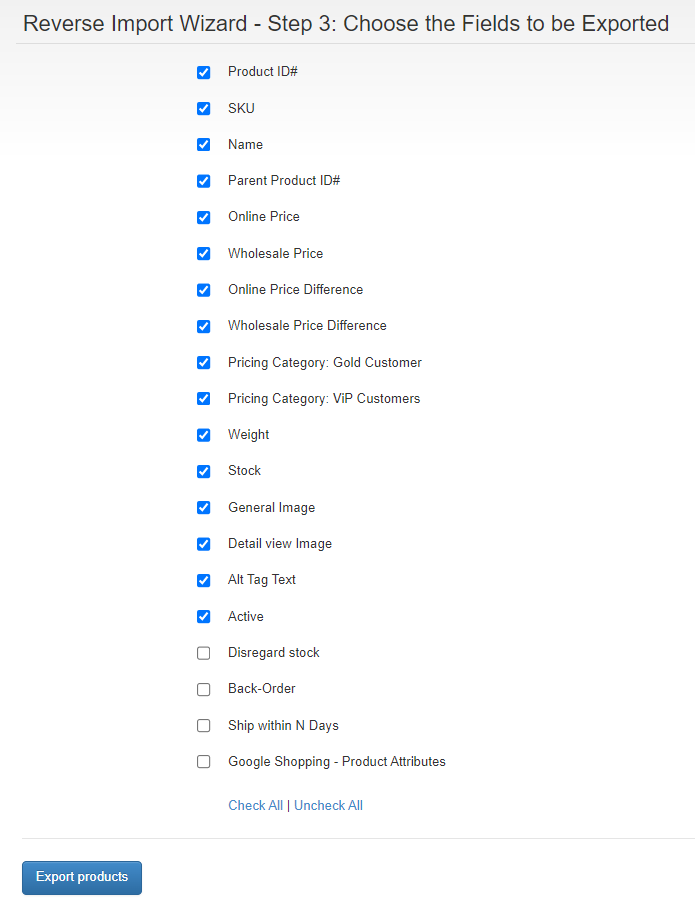
3. DOWNLOAD YOUR FILE
Just click on the download icon to download the file to your device.
4. EDITOR YOUR EXPORTED CSV FILE
In our example here, I deleted all the columns except the following:- Product ID#
- SKU **
- Name
- Parent ID#
- Online Price
- Wholesale Price
- General Image **
- Detail view Image **
- Alt Tag **
The double asterisks (**) denotes the required fields for editing images. You may want to add ALT text with the images or use the same image for the "Detailed View" instead of the featured parent product image. Otherwise, these fields would not be needed either. In the "General Image" column (and "Detail view Image" column if you'd like), you'll need to enter each file name that corresponds to each sub-product. If these file names do not match the file names that are in the catalog folder in ProductCart, the image import will not work for those sub-products.
NOTE: SKU numbers will have to be unique to the image intended for it. In our hoodie example, if all the sub-product SKUs were the same like "cl-hood-app" and we imported it, then ProductCart would change ALL images to match the "black" version of the image since it was the last image read before finishing. This would effectively make both gray and black hoodie sub-products show only the black image as the gray image would be overridden in the import process. To solve this in our example, appending a "_hd-gry" and "_hd-blk" was needed so ProductCart know NOT to overwrite the gray hoodie images with the black image.
5. START PRODUCT IMPORT WIZARD
Now it's time to use the Import Products Wizard . This can be found through your ProductCart dashboard main navigation by clicking on PRODUCTS > IMPORT PRODUCTS and clicking the "Proceed to Product Import Wizard" button. Here you'll have to select the edited CSV from the previous step.
Click "Upload" once file is selected, then new options will now show on this page.

Select the "Update current data if product SKU is an exact match with existing SKU" and " Ignore any category information included in the data file" radio buttons. We are not trying to adjust categories, just add pictures.
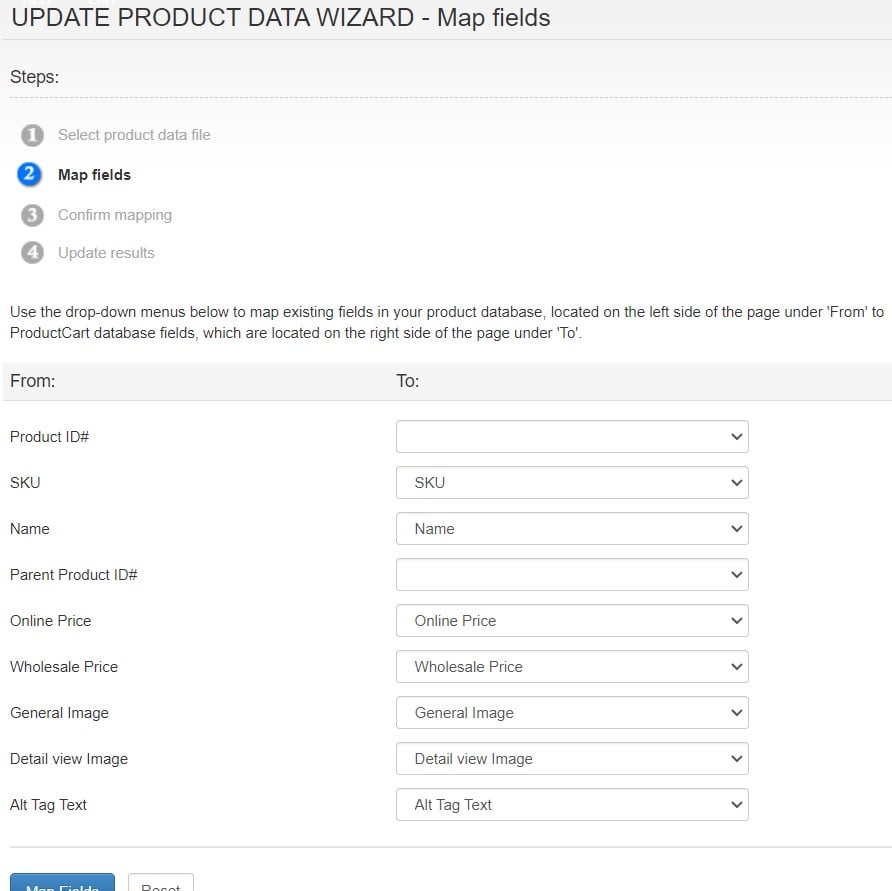
6. MAP FIELDS BETWEEN CSV AND PRODUCTCART
By default, the mapping should be accurate since the export from ProductCart uses the right column names for the import process. If something doesn't map, that's fine. SKU and Images are the most important fields. Click "Map Fields".
7. CONFIRM MAPPING
This step is just to make sure what you are mapping looks correct. As long as you didn't rename any columns in the exported CSV, the field names should match exactly in both the "From" and "To" columns. Click the "Go to Step 4" button to proceed.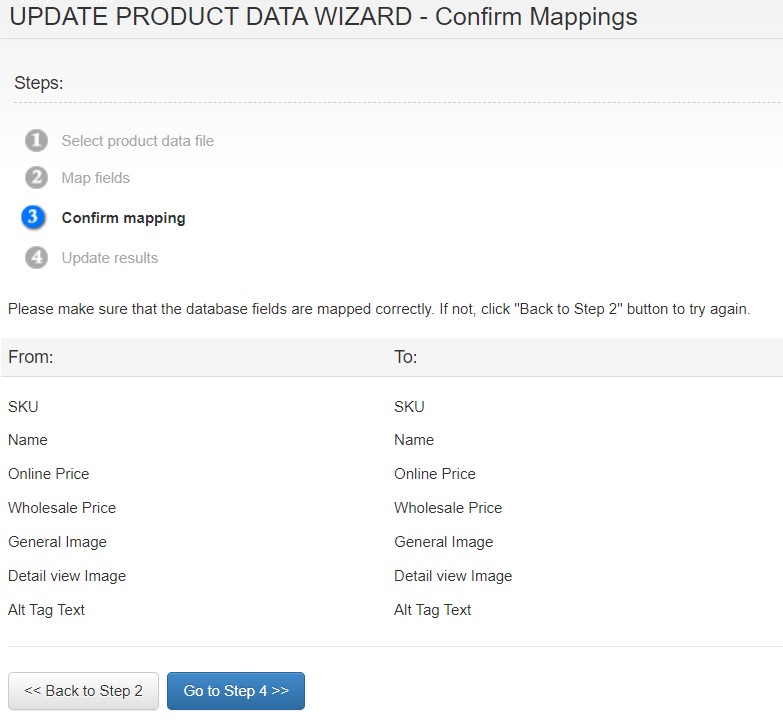
8. FINISHED!
Now all adjustments will have been made. To ensure that the correct images are showing, go through your the sub-products of your products and verify that everything looks as expected. The images should change as you select different sub-products.