Option Groups and Attributes
A product may be available in different sizes, colors, etc. Customers select these options (if any) on the product details page before adding a product to the shopping cart. ProductCart allows you to assign an unlimited number of option “groups” to your products, and each group can include an unlimited number of “attributes”.
Understanding Product Options
ProductCart gives you a great deal of flexibility in creating and managing product options:
- You can add an option to just one product in your catalog or more than one product at the same time.
- You can copy one or both of the options assigned to a product to one or more other products.
- You can sort option attributes so that they are shown in a specific order.
- You have the ability to associate an additional price with each product option:
- The price can be the same for all products using that option, or specified on a product by product basis (e.g. an online gallery may charge $20 for a “black frame” regardless of the size of the poster that the customer is buying, or instead charge a different price for it depending on which poster is being purchased).
- The additional price can be different for retail and wholesale buyers (e.g. the price for the same black frame may be $20 for retail customer, but only $12.50 for wholesale buyers).
- The price can be a positive or a negative number. Continuing on the same example, posters may include a standard frame, but customers have the option of buying a poster with a deluxe frame (add $30) or without a frame (subtract $10).
- The positive or negative option price is automatically added to the product's base price when the product is added to the shopping cart.
- You can set a product option as “required” or not. For example, customers may be required to select the size of a sweater, but not the optional gift wrapping.
Option Groups and Attributes
 Before you add options to your products, let's take a look at how they are organized in your store's database. Product Options work as follows:
- Option Groups - Option groups define the main option name (size, color, weight, etc.).
- Attributes - Attributes are choices within that group (small, medium, large, etc.). So to assign a product a certain set of additional options (e.g. three or four sizes), you will first associate the product with an option group (e.g. size), then select the attributes to add to that group (e.g. small, medium, and large). You can order attributes when you assign them to a product, so that “x-small” would be shown before “medium” (although alphabetically it wouldn’t) in the “Size” drop down menu on the product details page.
Adding a New Option Group
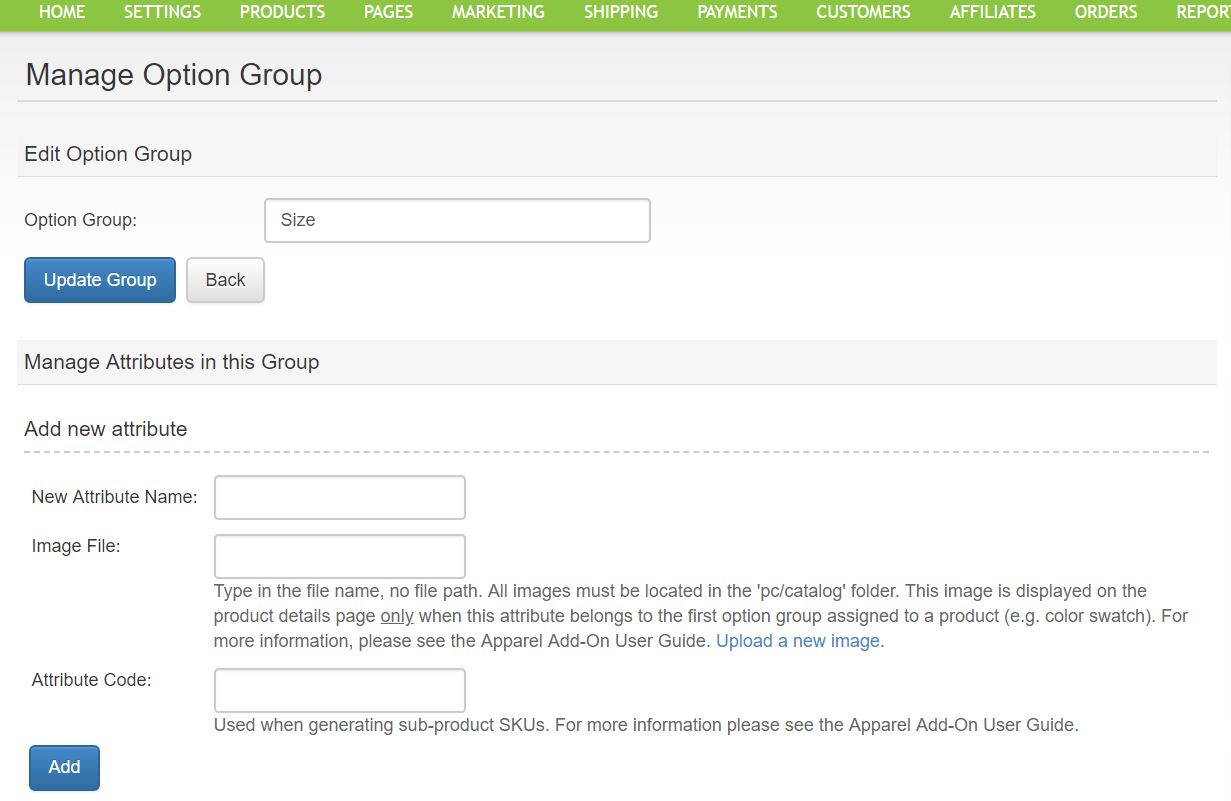
You cannot assign options to a product unless you have created at least one option group. Therefore, the first step will be for you to create one or more option groups. To add option groups to your store catalog, follow the steps outlined below.- From the Products menu, select Manage Options. If this is the first time you set product options, a message will indicate that no option groups have been defined. After you have added option groups to the database, this same window will list them and allow you to rename them, delete them, and add attributes to them.
- To create a new Option Group, click on the Add New link. A new window will be displayed. Name the new option group, then click on the Save button to return to the previous page. For example, “color” or “size” could be the name of a new option group. The new entry will now appear in the list.
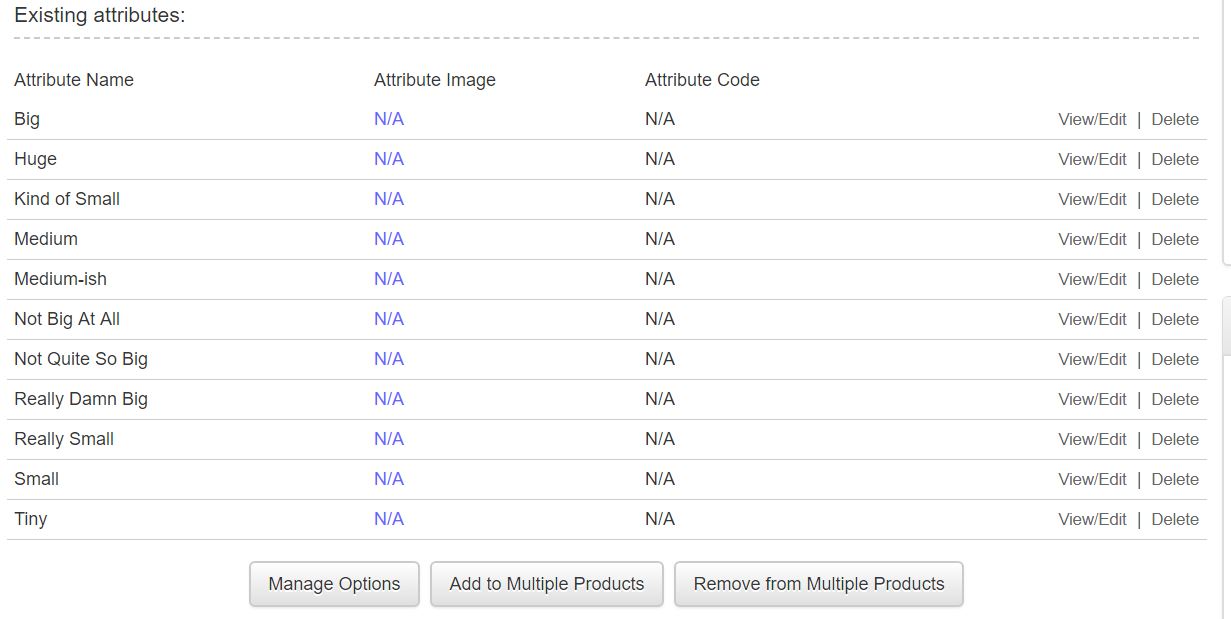
- Now click on Manage Attributes to add attributes to this group. Attributes are the actual options that users will select when purchasing your products or services (e.g. size: large). Type the attribute name in the Add New Attribute field, and then click on the Add button.
 When you rename option groups or attributes you will affect all products to which they have been assigned
Assigning Options to One Product
 Now that you have created an option group and added attributes to it, you can assign it to one or more products. Let’s first look at how you can assign options to a single product. To do so, first locate the product using the
Products > Locate a Product feature, and then click on
Options on the search results page.
Now that you have created an option group and added attributes to it, you can assign it to one or more products. Let’s first look at how you can assign options to a single product. To do so, first locate the product using the
Products > Locate a Product feature, and then click on
Options on the search results page.
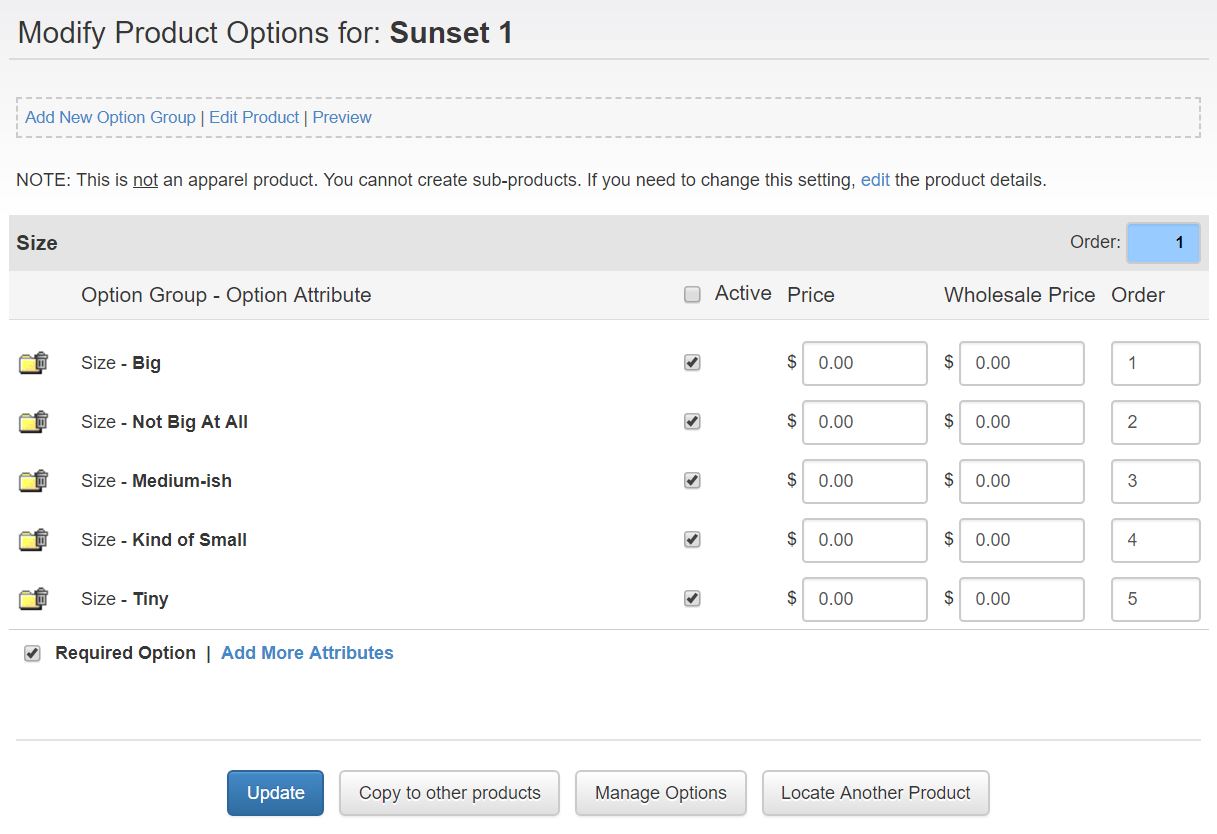
Because you have not assigned options to this product before, the page prompts you to add an option group. You can add an unlimited number of option groups. Add a first option to the product by clicking on Add New Option Group. You have three options:
- Add a new option group to the product - Select one of the option groups that you had previously added or create a new one. Then, select some or all of the attributes that have been defined for that option group. ProductCart allows you to associate a positive or negative price difference with each attribute, with the ability to specify different values for retail and wholesale customers.
- Copy All option groups from another product - Use this option to quickly assign to the product the same options used by another product. Select the product from the corresponding drop-down, then specify whether you wish to also copy the pricing differentials, and whether you want to overwrite existing option attributes, if any.
- Copy one option group from another product - This feature works similarly to the one described above, but in this case ProductCart allows you to select a specify option group to copy, rather than all of them.
Product Options in Your Storefront
 In the storefront, option will be shown to your customers on the product details page, with a drop down menu for each option group. The name of the drop down is the option group name. The attribute names are the selectable options in each drop-down.
Ordering
By default, attributes are ordered alphabetically. This however may not work for you. For example, if you were selling clothes, the sizes “medium”, “small”, “large” and “x-small” need to be ordered in a way other than alphabetical to make sense to the customer. To order attributes, enter numbers in the Order field considering that the lowest number will be shown as the first attribute in the drop down menu.Price Differences
Price differences are displayed as follows:- Positive price difference. The word “Add” and the amount are displayed next to the option name (e.g. “X-Large – Add $5.50”). When the customer adds the product to the shopping cart, the difference is added to the unit price for the product.
- Negative price difference. The word “Subtract” and the amount are displayed next to the options name (e.g. “No picture frame – Subtract $45”). When the customer adds the product to the shopping cart, the difference is subtracted from the unit price for the product.
Required Selections
Another important feature is the Required Option check box. When you check this box customers will be required to select an option before adding the product to the shopping cart. An alert box with the name of the option field is displayed when they attempt to add the product to the shopping cart from the product details page. This gives you the ability to handle different scenarios in which product options may or may not need to be specified. Note that if you use the category display option where multiple products can be added to the shopping cart from the category page, the quantity field is not shown for any product for which users need to select an option.
Assigning & Removing Options to/from Multiple Products
Let's now consider the scenario in which it would be more efficient for you to assign options to multiple products at the same time. This is typically the case when the same type of option applies to a number of different products in your catalog. For example, your online clothing store may carry 30 different t-shirts, all available in small, medium and large sizes.To assign options to multiple products at the same time, follow these steps:
- From the Products menu, select Manage Options. Locate the option group that you would like to work with or create a new one, then click on Assign to to assign that option group to multiple products at once.
- Next, use the search feature to find and select the products to which you would like to assign this option group. You can select products on more than one search results page.
- On the next screen, specify which of the available attributes apply to these products, associate price differences with them (if any), order the attributes, and finally set whether or not the option group should be required.
- You are done. If you need to, you can now locate a product, select Options, and edit any of the options that you have just assigned to it.
Repeat similar steps to remove an option group (or just one attribute belonging to a certain option group) from multiple products at once. For this purpose, you will use the Remove From feature on the Manage Options page. When the search screen is shown, if you don’t select any search filters, you will be presented a list of all products that are currently using that particular option group. To remove the entire option group from one or more of them, select all the attributes that belong to that group. Otherwise only the selected attributes will be removed.