What they are
You can add an unlimited number of custom input fields to your store's registration and checkout pages. For example, some stores may require their customers to provide their Tax ID before allowing them to checkout, while others might need to store a “Reseller” or “Account” number.
 Custom input fields have the following characteristics:
- When active, they appear below the customer’s billing information on the registration and/or checkout pages, with the description entered on this page under Field Description.
- They can either be required or not.
- After registering with the store, users can edit the information entered in these fields by editing their account information from the customer service area of your store, or by editing the values in the fields when they checkout (the new values are saved to the database if they edit them when placing an order). The store manager can edit the same fields when viewing/editing the customer account in the Control Panel.
- The information provided in these fields is added to the order details and can be viewed by the store administrator when processing an order.
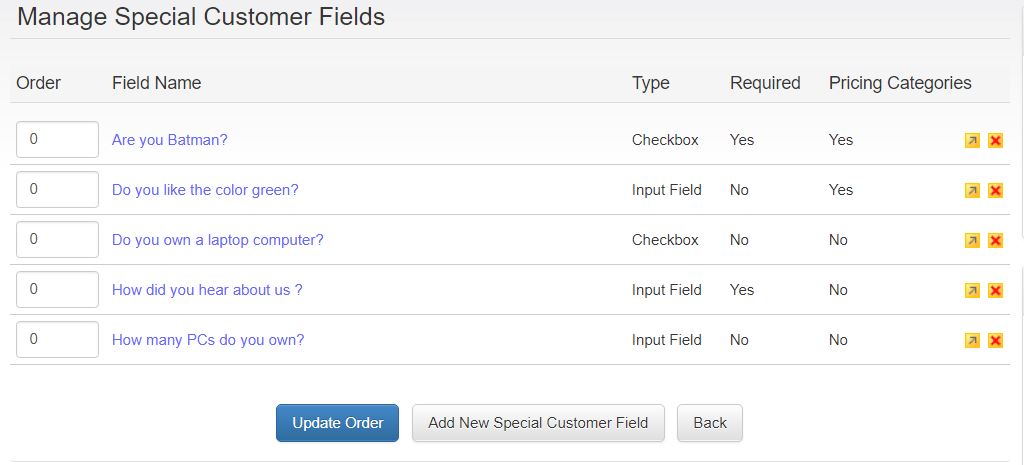
Adding and editing special customer fields
 To add or edit Special Customer Fields, select the corresponding link from the
Customers menu. The page provides a summary of special customer fields that were previously added to the system. To add a new field, click on
Add New Special Customer Field. The following is a description of the features that are shown to you on the page:
To add or edit Special Customer Fields, select the corresponding link from the
Customers menu. The page provides a summary of special customer fields that were previously added to the system. To add a new field, click on
Add New Special Customer Field. The following is a description of the features that are shown to you on the page:
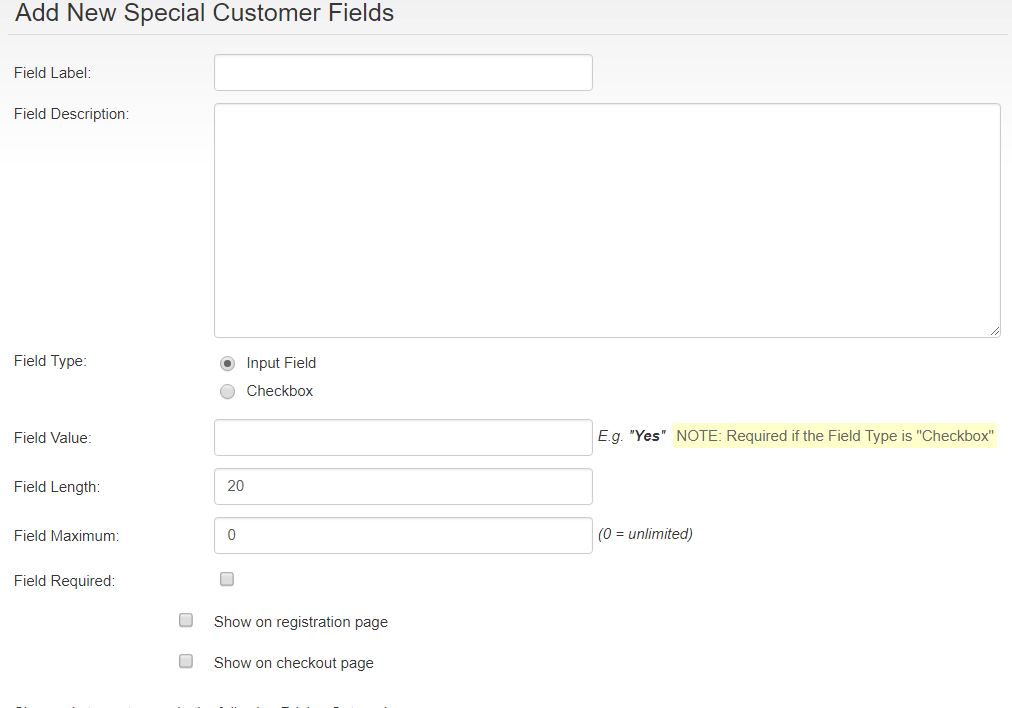
- Field Label
This is the text that will be shown next to the field whenever the field value is reported or displayed. For example, “Account Number”. We recommend that you keep the label as short as possible to avoid display issues. - Field Description
Rather than using a long label, you can describe what the field is used for using the description. The field description is shown in select pages in the storefront to help customers understand the kind of information that you are asking them to fill out. For example, the field label could be “Account ID”, and the description could say “Enter the account number that was provided to you when you signed up for our service.” - Field Type
Special customer fields can either be displayed as an input field (where the customer enters some text) or a checkbox (where the customer simply checks whether the statement is true). For example, the field description could be “Have you ever visited our retail store in San Francisco?”, the field label could be “Visited Store”, and the field in this scenario could simply be a checkbox that the customer would check to answer “yes” to the question.
The value that is saved to the customer account when the checkbox is checked is the value that you enter as the Field Value. For example: “Yes”. You need to provide a field value when the Field Type is “Checkbox”. - The following two fields apply only when the field type is Input Field:
- Field Length: enter a number (e.g. 25). The field is always a one-line input field.
- Field Maximum: enter the maximum number of characters. Enter 0 for unlimited.
- Field Required
Specify whether the field is required or not. If it is, customers will not be able to register with your store unless they fill out the field. - Show on registration page
The field will be shown when customers register. Customers may register during the checkout process, or separately from checking out. - Show on checkout page
The field will be shown when customers are checking out using their existing account (they are not registering as they registered before). This is typically not necessary if the information is collected only once (e.g. you don’t need to ask your customers for their “Account ID” every time they checkout). The field will be pre-filled with the value previously saved to the customer account. - Restrict to Pricing Categories
You can restrict a special customer field to one or more pricing categories. To select more than one category, keep the CTRL button down. This means that the field is shown only when a customer is logged in and the customer had been been assigned to one of the selected pricing categories. When this feature is active, the field is never shown during registration, since a new customer cannot belong to any pricing categories until you assign him/her to one.