 This section applies mostly to US merchants, although you can use this feature of ProductCart outside of the US too if you can apply tax rates based on the customer’s postal code.
It is important to understand when you are required to collect sales tax in your Internet store, and for which states. Most online sellers collect tax only in the state(s) where they have a “nexus”, or physical presence. The definition of nexus varies from state to state, but can include employees, agents, telecommuters, premises, personal property, or even web servers. Check with your CPA or the state directly to determine if your company has a nexus in that state.
Accounting for multiple local sales tax levels
Sales tax can be at local levels beyond just the state rate. These local rates can include the county, city, special purpose district (SPD), and metropolitan transit area (MTA). Keeping track of these rates and rate changes is essential to ensure that you are charging the correct sales tax rate for your online transactions.
ProductCart recently partnered with Tax Data Systems to allow US-based users of ProductCart to quickly, easily and accurately calculate sales tax on orders placed on their store.
If you would like to use a tax data file to calculate taxes in ProductCart, but elect not to use Tax Data Systems’ services, you can manually create a tax data file. Please refer to this technical article for details on the file format that you will need to adhere to.
Tax Data Systems provides inexpensive subscription services to complete and updated data files that contain all the information that is needed to properly calculate sales taxes. The company sends regular updates to its customers to keep them up-to-date with the latest tax changes.
Benefits of using Tax Data Systems' data files with ProductCart
ProductCart contains a sophisticated tax module that takes advantage of Tax Data Systems’ data files to allow your store to effectively perform the following tax-related tasks:
- Properly calculate sales tax, based on the tax rate associated with the customer’s shipping address.
- Correctly handle scenarios in which a ZIP code includes multiple city/county combinations and therefore multiple tax rates are associated with it. The customer will automatically be prompted to select the county/city combination that they reside in.
- Automatically determine whether shipping charges should be added to the taxable total.
- Automatically determine whether handling fees should be added to the taxable total.
Do you need a tax file?
If your company has a physical presence in one or more US states, and if any of those states are listed in the table shown below, then local tax rates are used, and the answer to the question of whether you should use a tax data file is “yes”. If your state is not listed, then it means that either there is no sales tax in your state, or a uniform tax rate is applied across the state. Contact your local tax authority for more information on how sales taxes should be calculated in your state (and in all other states in which your company has a physical presence). Below is a list of the states that collect local taxes.
- Alabama
- Alaska
- Arizona
- Arkansas
- California
- Colorado
- Florida
- Georgia
- Idaho
- illinois
- Iowa
- Kansas
- Louisiana
- Minnesota
- Mississippi
- Missouri
- Nebraska
- Nevada
- New Mexico
- New York
- North Carolina
- North Dakota
- Ohio
- Oklahoma
- Pennsylvania
- South Carolina
- South Dakota
- Tennessee
- Texas*
- Utah
- Virginia
- Washington
- Wisconsin
- Wyoming
 NOTE: If you are shipping orders from Texas, you do NOT need a tax file as taxes are calculated based on the shipper's location (so only one tax rate is needed). If you are shipping orders to Texas from outside of Texas, and your company has a physical presence in Texas, then you need a tax file as taxes are calculated based on the customer's shipping address.
Obtaining a tax data file from Tax Data Systems
Once you have determined in which states your company has a physical presence and which of those states require the company to pay sales taxes, contact Tax Data Systems to purchase a subscription service to tax data files for those states. In most cases, you will probably need just one tax data file for the state in which your company resides.
As a ProductCart customer, you are eligible to a special discount on Tax Data Systems’ subscription services. For more information and to purchase one or more tax data files, please visit our support page on using data files to calculate taxes.
Once you have obtained the data file from Tax Data Systems, you can return to ProductCart and finish setting up the tax settings. If you purchased more than one file, carefully review the next section.
Combining multiple data files
You can only use one data file at a time in ProductCart. This means that if you purchase two or more data files (two or more states) from Tax Data Systems (e.g. your company has an office in California and one in New York), you will need to combine them into one and upload the combined file to ProductCart.
Use the following procedure to combine two or more CSV files into one:
- Open the first file with Microsoft Notepad
- Select all data except the first row. The first row is the one that ends with “TAX_SHIPPING_AND_HANDLING_TOGETHER”. The second row starts with a ZIP code.
- Select Edit/Copy.
- Open the 2nd file with Microsoft Notepad.
- Go to the very bottom of the file. Press the Enter key on your keyboard to create a new row, then place the mouse cursor then. This new row should be the very last row of the Notepad file. To ensure that this is the case, click the Delete key on your keyboard until this is the last row of the file.
- Select Edit/Paste. The data copied from the first file will be pasted into the second file.
- Select File/Save. Make sure to save the new file using the *.csv extension. For example, you could save this new file as mytaxFile.csv. Make sure the file name does not contain any spaces.
- Proceed to the next section, which contains information on how to upload your tax data file to ProductCart.
Configuring ProductCart's Tax Module
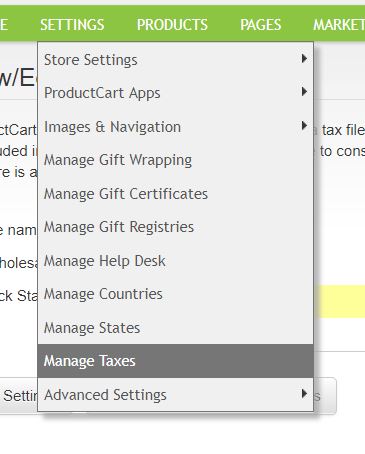
- Log into your ProductCart Control Panel and select Store Management Tools > Tax Options > View/Edit Tax Options. From the screen that is shown to you, select the option to use a tax file.
- Upload the data file received from Tax Data Systems to your store using the built-in upload feature. To do so, click on the text link Upload the file to your store, locate the file on your computer using the Browse button, then click on Upload.
Your file will be automatically uploaded to the “productcart/pc/tax” folder on your Web server. If you receive an error during the upload procedure, it is likely that the “pc/tax” folder does not have “write” permissions. Please refer to Chapter 2 of this User Guide for information on how to properly set folder permissions for your ProductCart store. Of course, you can also upload the file to your server using an FTP program.
If and when you receive an updated tax data file from Tax Data Systems, simply upload the file to your store. You will not need to change any of the other settings as the file will likely carry the same file name. If the file name has changed, make sure to enter the correct one as indicated in Step 2.
- Enter the name of the file that you just uploaded to the store in the corresponding input field. For example, the naming convention of the tax files is the state abbreviation underscore complete.csv (e.g. “CA_complete.csv”). Make sure to include the “.csv” extension when you enter the file name in the corresponding field. If you enter a name that does not match that of the file that you uploaded to the store, you will receive an error message during checkout.
- Select whether wholesale customers should be taxed or not on your store.
- Enter one or more “fallback” tax rates for the states in which you pay taxes.
The fallback sales tax rate is the rate that will be used if a match for the customer's shipping address is not found in your tax rate file (e.g. the customer types an incorrect zip code or a new zip code is added by the State and your file has not been updated to reflect this).
For example, if your company resides in California and you only have a physical presence in California, then the tax data file that you uploaded to your store will likely only contain tax rates for California, and your fallback tax rate state will be only California. If you collect sales taxes for more than one state, enter them as fallback states.
- Place an order in your storefront to ensure that taxes are properly calculated. ProductCart will look at the ZIP code of the customer’s shipping address match it to a tax rate in the data file that you have uploaded. If there is no match, and if the state entered for the shipping address is not one of the fallback states listed in the tax settings, ProductCart will assume that the order does not need to be taxed. If there is more than one match, ProductCart will prompt the user to select the city/county in which they live in.
As long as the file is properly formatted, ProductCart will automatically determine whether shipping charges and/or handling fees should be part of the taxable total. The file contains two columns which control this: TAX_SHIPPING_ALONE and TAX_SHIPPING_AND_HANDLING_TOGETHER. Enter either N or Y into these columns to control these options.
The shipping address specified for the order is always used to determine sales taxes to be applied to the order, if any. The shipping address is the customer’s billing address unless the customer specifies a separate Ship To address during checkout.
Once you have setup the tax calculation to use a database, ProductCart shows you a summary of such settings every time you click on View/Edit Tax Options from the Tax Options menu. From that screen you can either keep the tax settings 'as is', edit them (e.g. change the fallback tax rate), or switch to alternative ways to compute taxes, which are described in the next sections.
Troubleshooting problems related to using a tax file
If you are receiving an error when placing a test order, and the error occurs during the checkout process, after the shipping selection page and before the order verification page are shown, and/or the error details shown by your browser include the file name tax.asp, please check on the following before contacting us for technical support:
- Make sure that you have uploaded a tax data file to the pc/tax folder.
- Make sure the file has a “.csv” extension (e.g. myTaxFile.csv).
- Make sure that the file name specified in the Tax Settings area of the Control Panel matches the name of the file uploaded to the pc/tax folder. Also confirm that the file name does not contain any spaces or special characters. If it does, change the file both in the folder itself using an FTP program, and in the Control Panel.
- If you combined two or more files together, review the instructions listed earlier in this section. Specifically, make sure that you did NOT include the header of the first file when you copied it into the second file.
If you are having an issue with the tax data file itself, please contact Tax Data Systems.